Start in Sogni Create.
For the clearest first pass, start in Sogni Create in the browser. If you prefer a desktop workflow, you can move to Studio later, and mobile is available when you need it.
The advantage is speed. You can enter the workflow immediately, keep creative control, and avoid waiting for a separate visualization round.
Start with Qwen Image Edit, then choose the pace that fits the job.
For this walkthrough, start with Qwen Image Edit. Choose ultra-fast or standard depending on whether you need rapid conceptual feedback or a more deliberate, refined pass.
Use Flux 2 when you want to work from multiple reference images at once. Otherwise, Qwen Image Edit is the simplest place to begin.
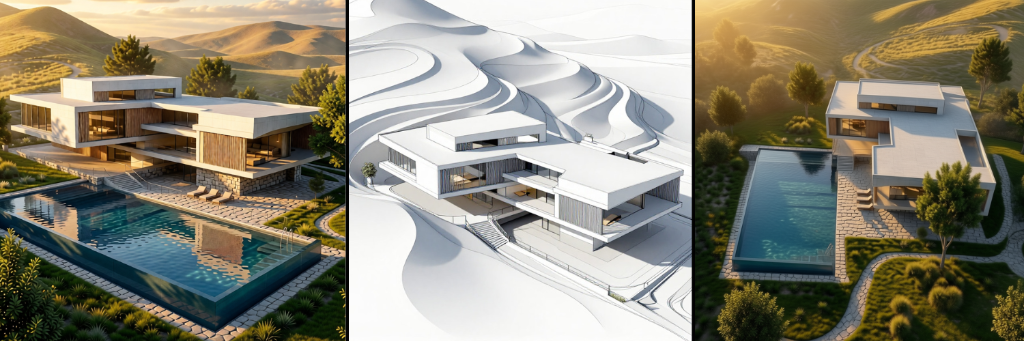
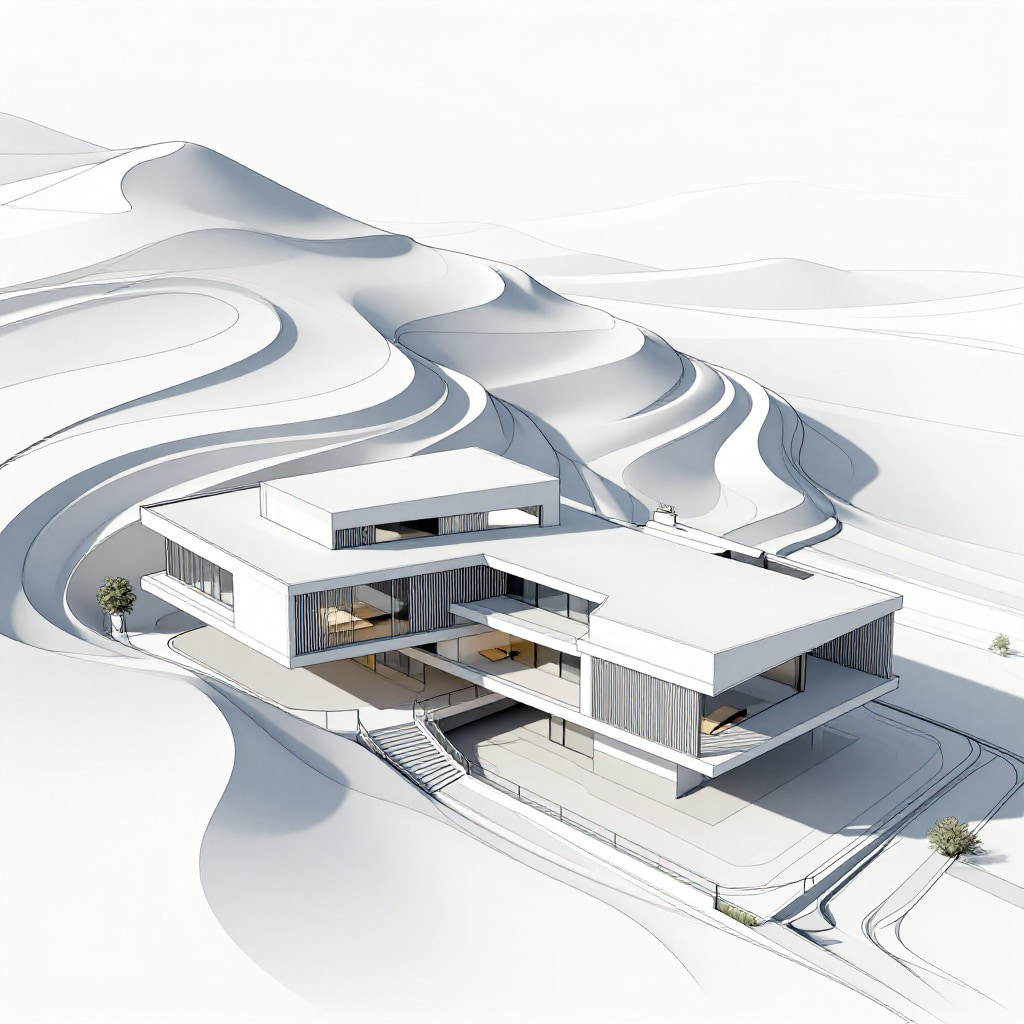
Upload your sketch as a reference.
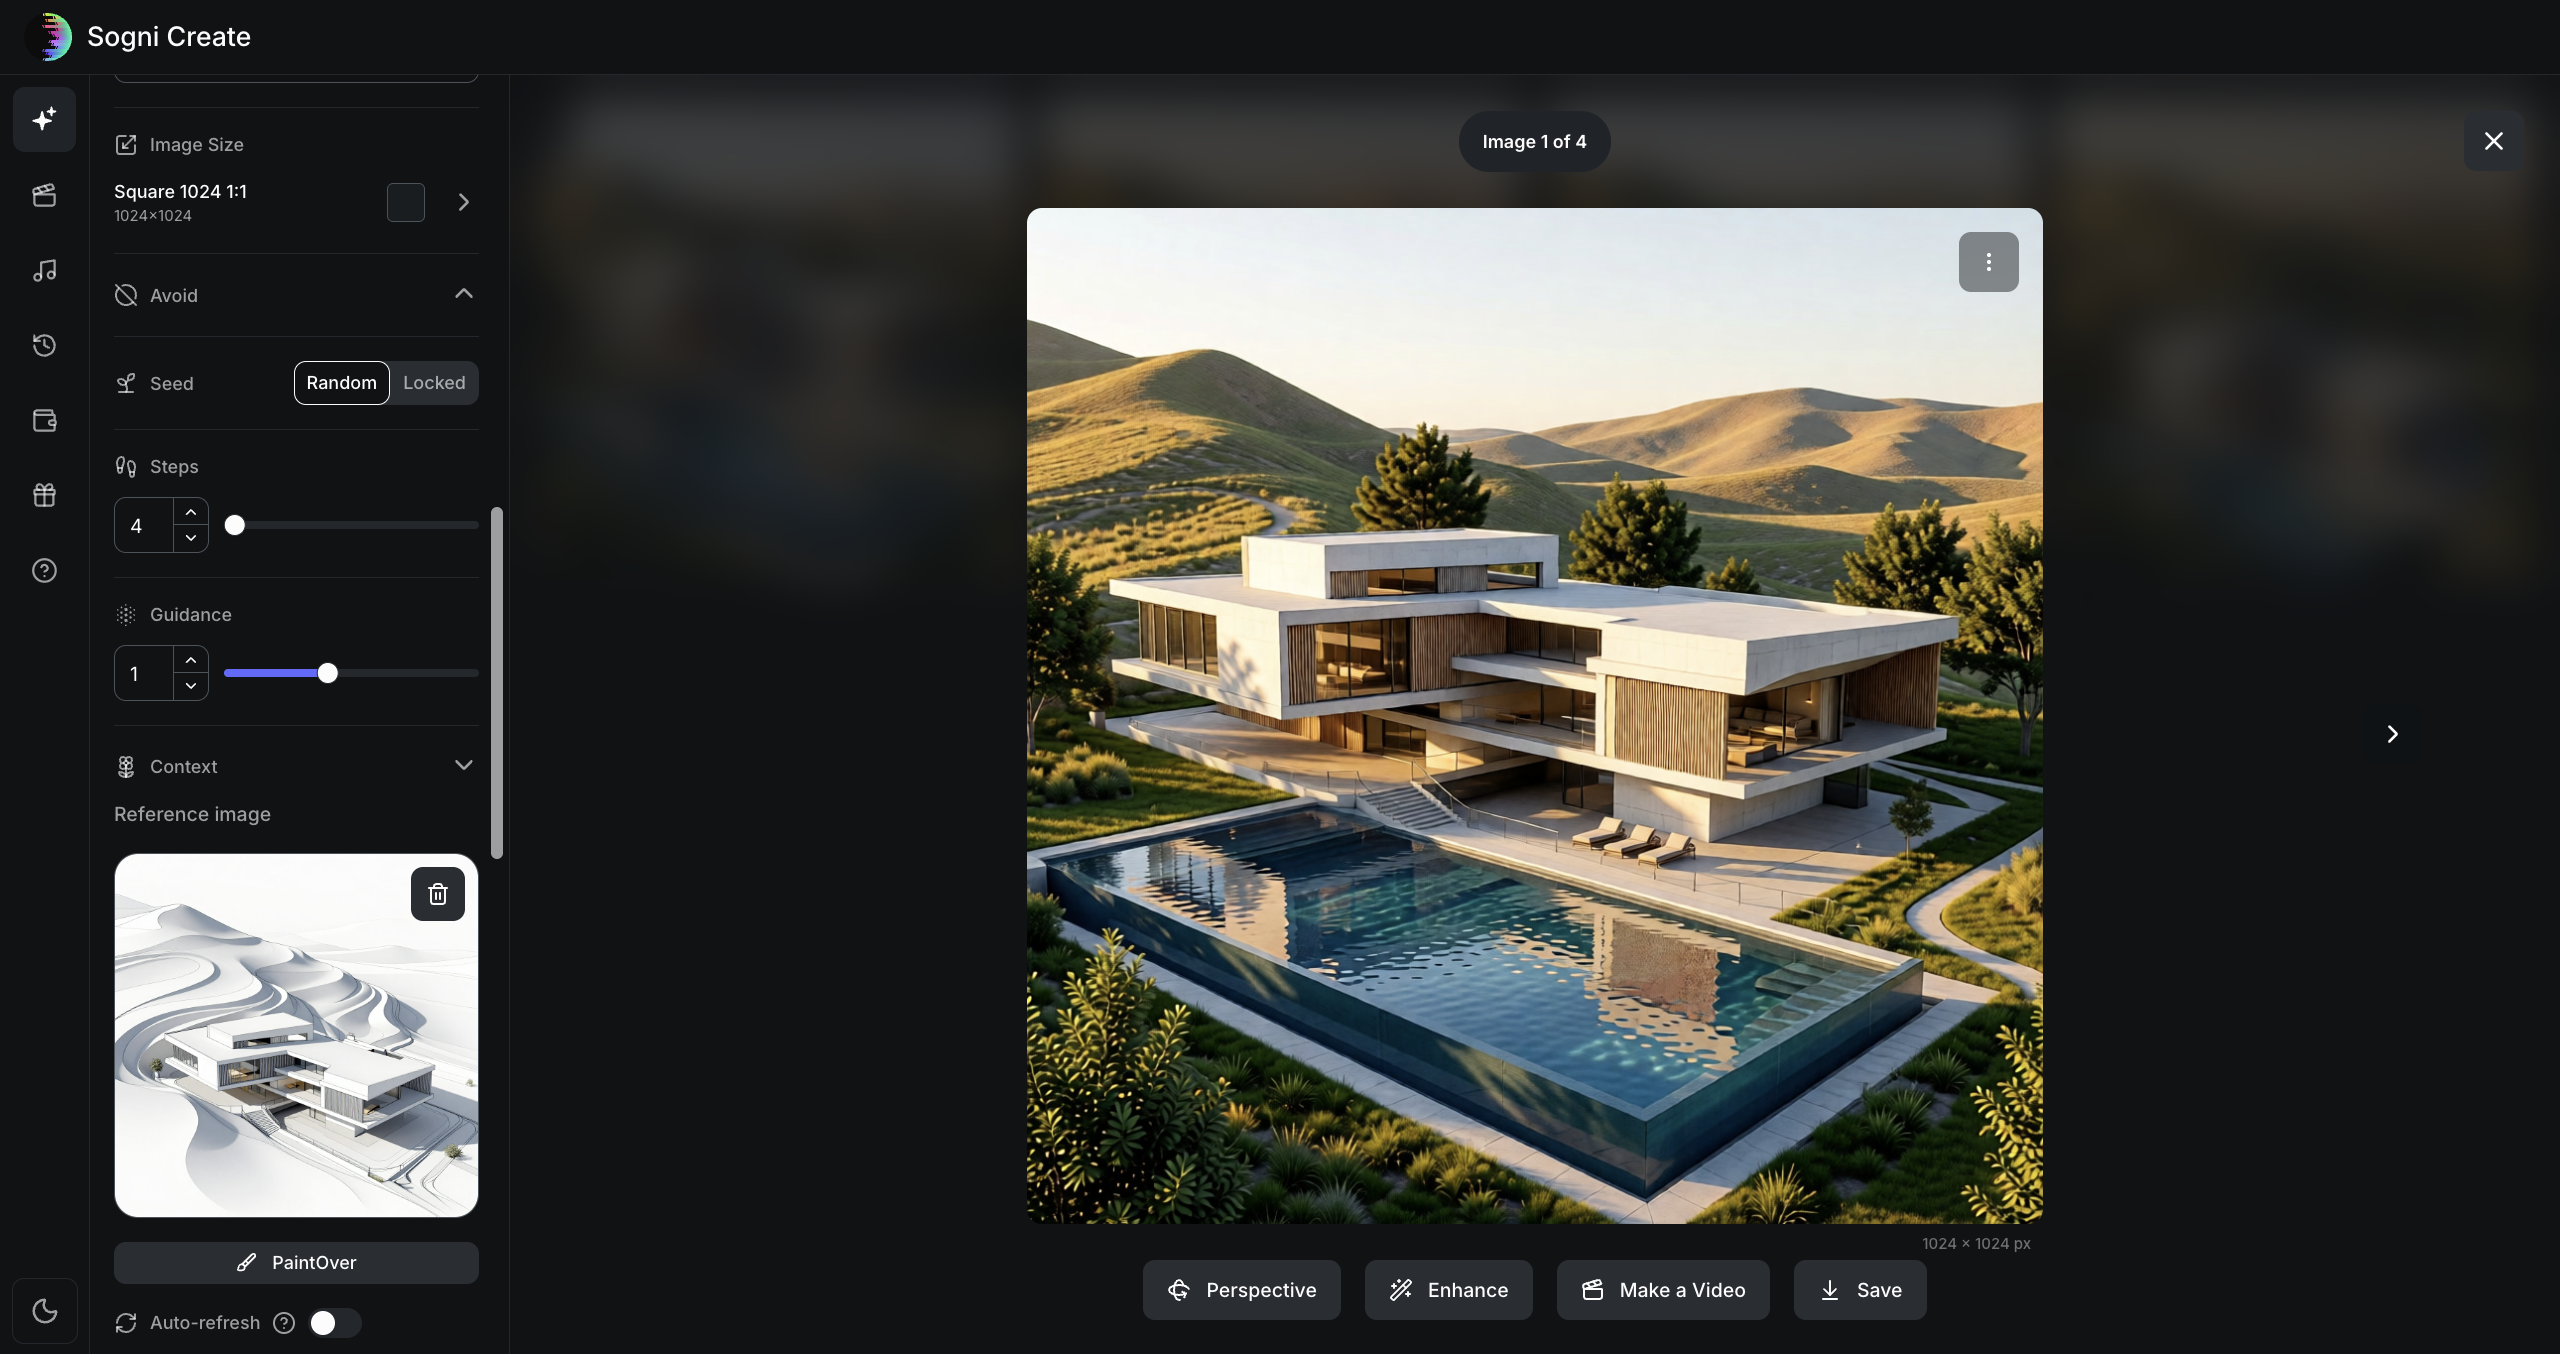
This is where everything starts. Upload your sketch here and adjust the image size accordingly. You can leave the rest of the settings, such as Steps and Guidance, at their default values.
At this stage, you are protecting the original structure and composition. Once that foundation is locked in, you can push the project toward realism without losing the idea.
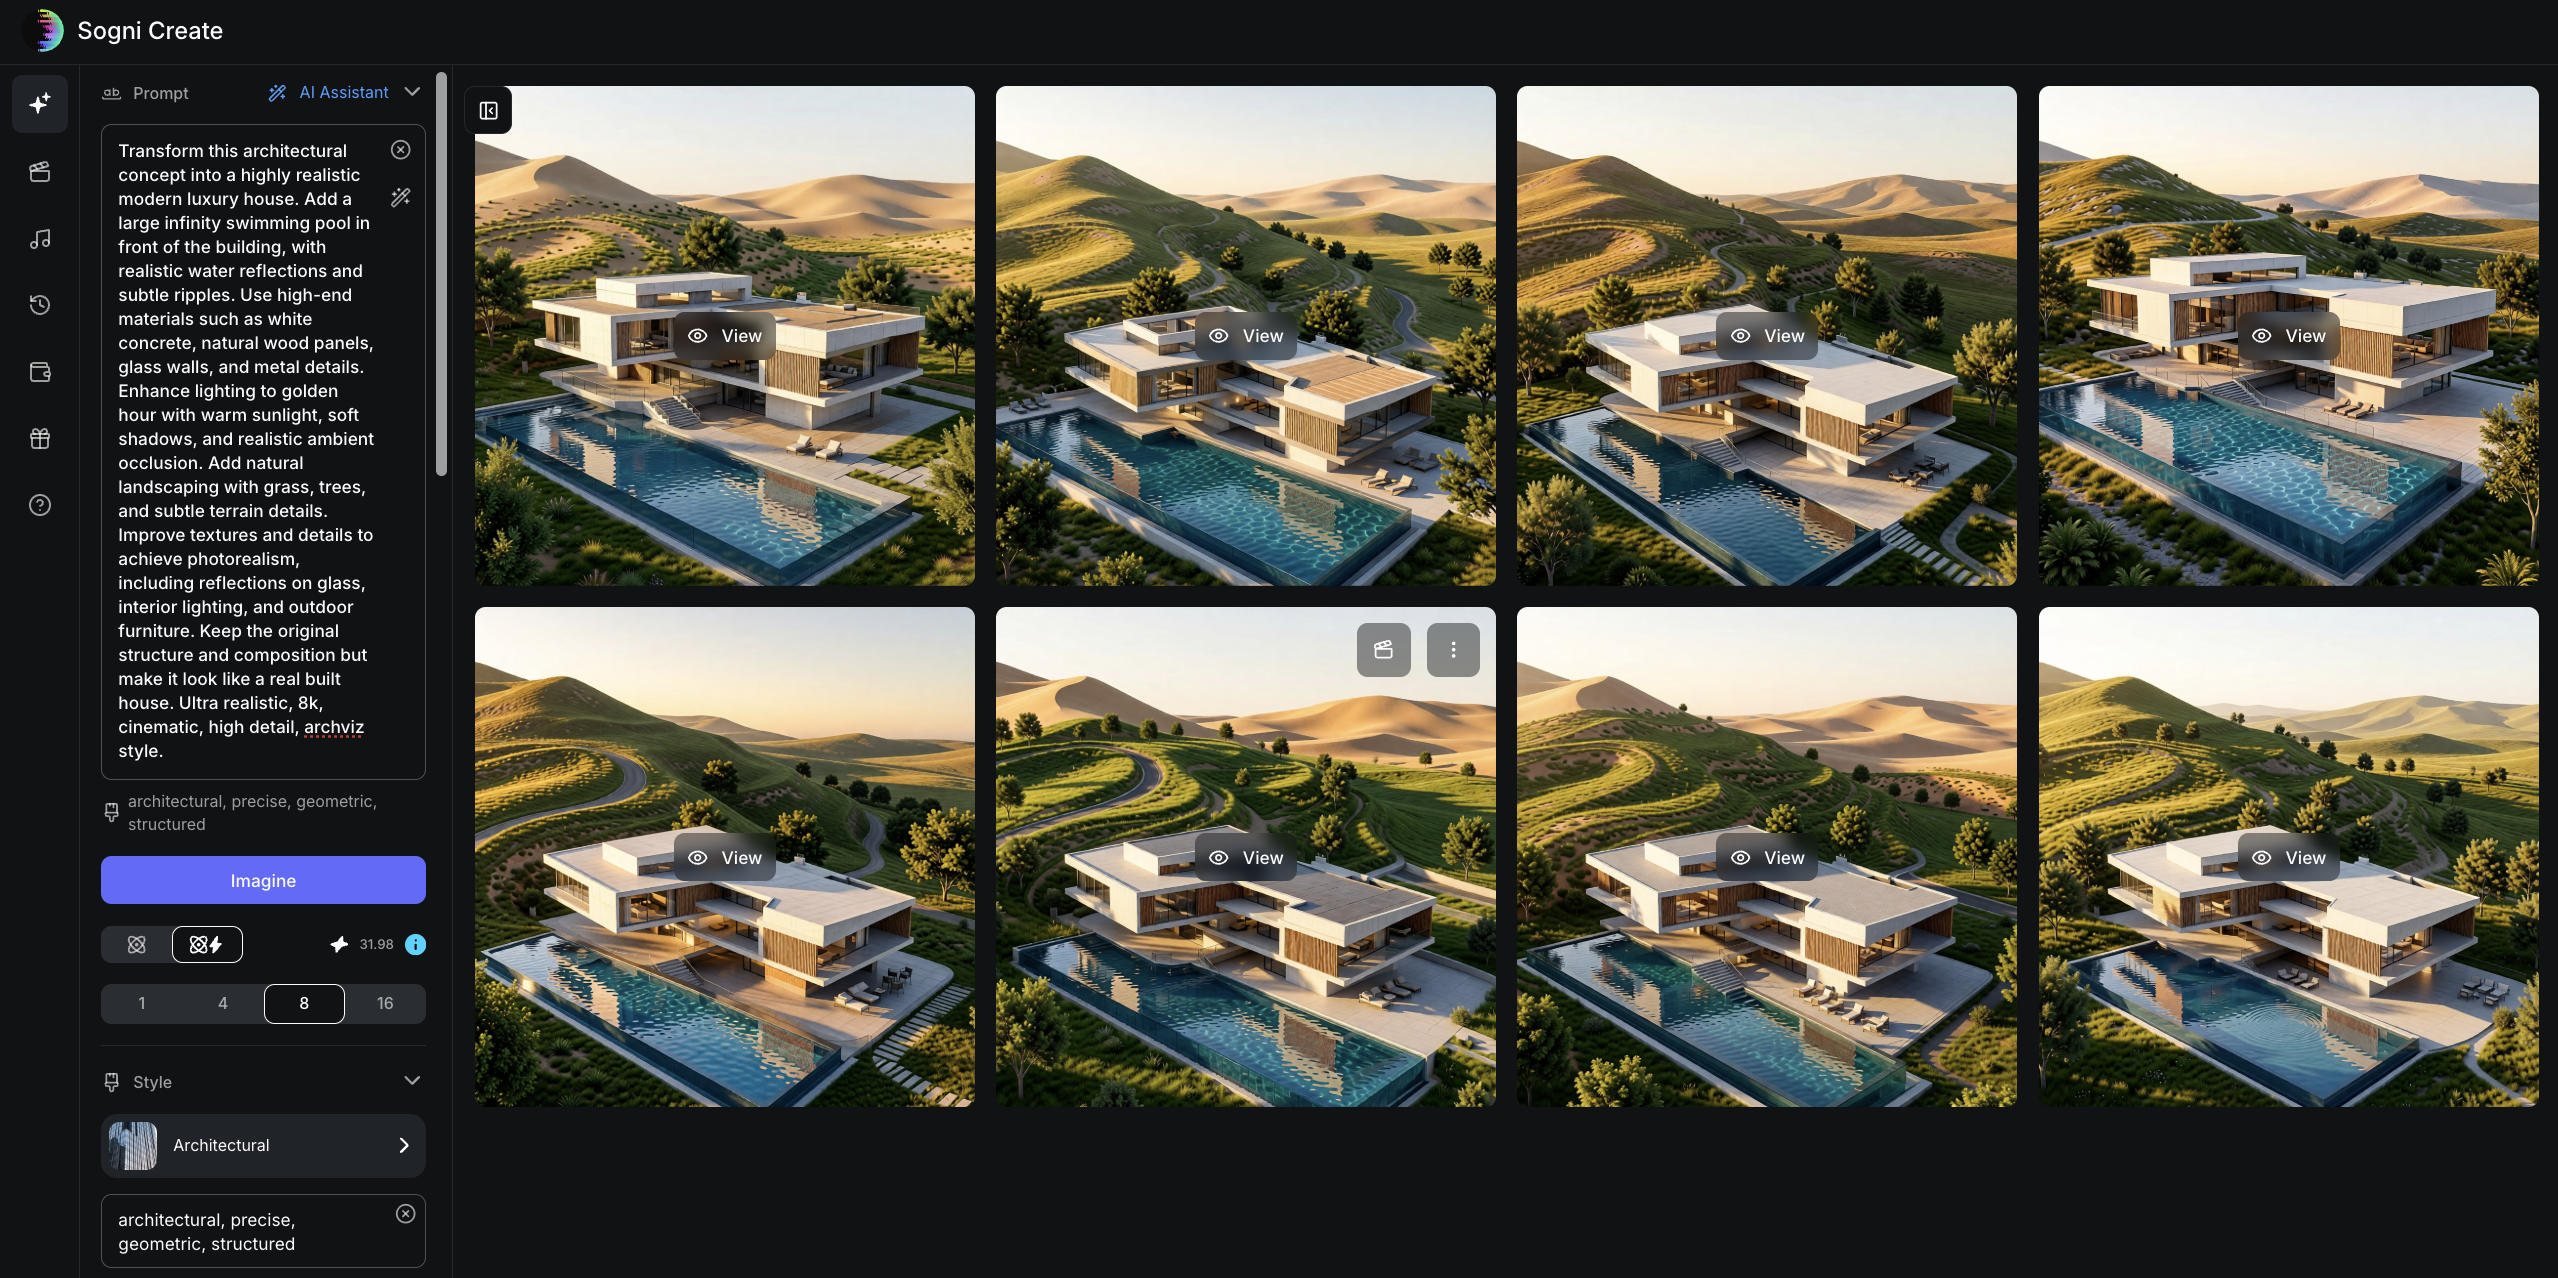
Enter the prompt like a design brief.
Focus first on materials, lighting, landscaping, and overall mood. Those choices create the biggest visual shift and give the model a clear direction.
Leave minor details for later refinement, then choose how many images you want to generate. You can select a style like Architectural, but leaving it on Default will also deliver strong results.
Choose the output you like the most, then push it further with Enhance.
There are multiple tools available, but in this case the following work especially well:
- Boost Realism
- Fine Details such as Refine Fine Details or Enrich Scene Details
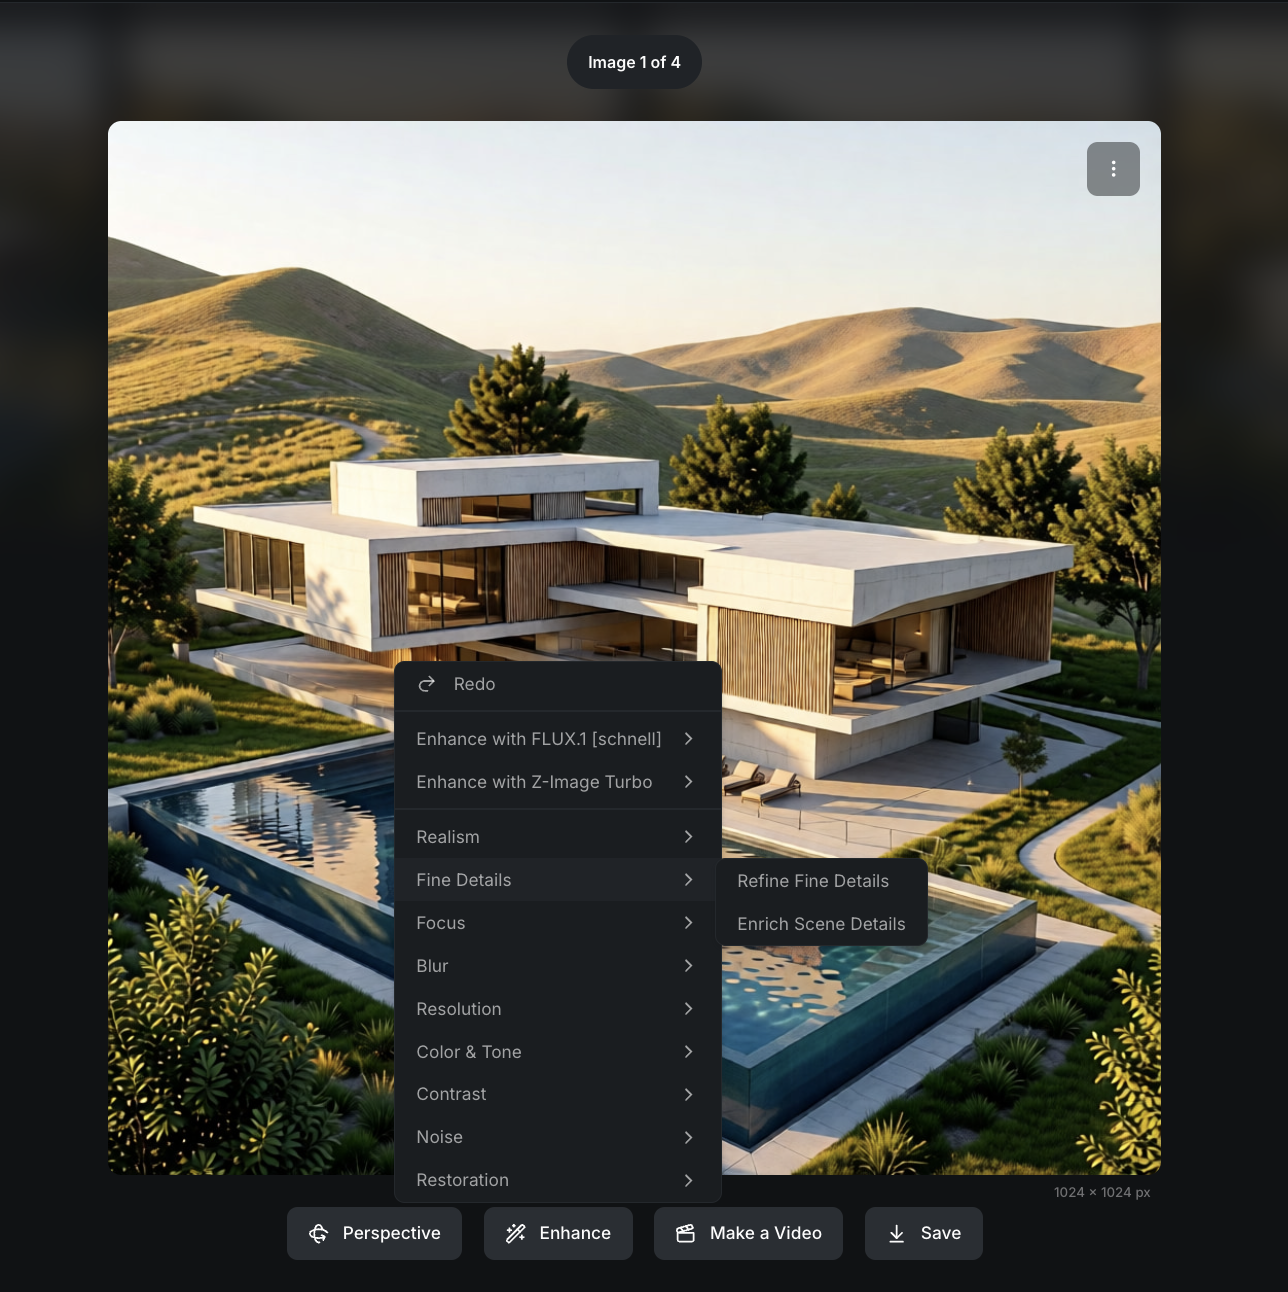
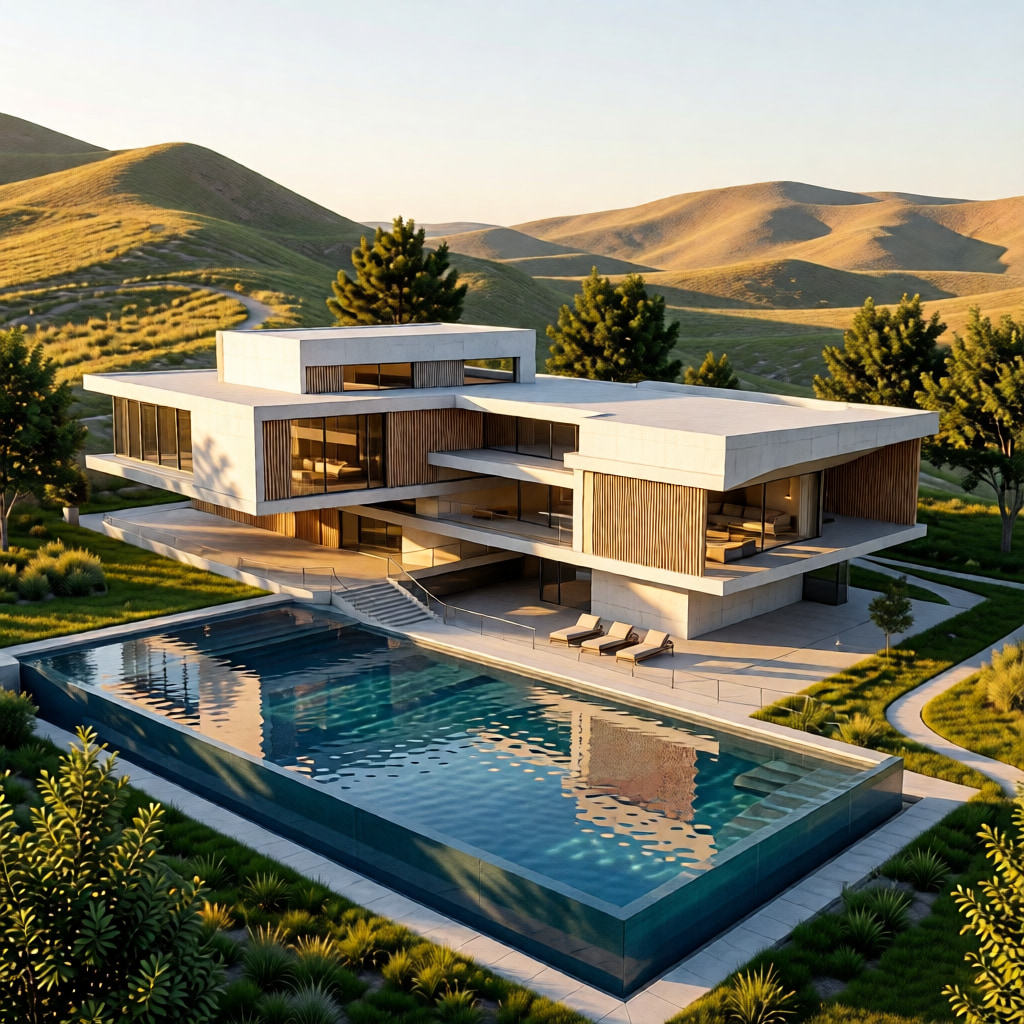
This is where the visualization becomes much more compelling, with richer colors, stronger reflections, and refined details. You can also use Undo and Redo to compare results and keep experimenting.
Once you have one polished still you trust, you are ready to expand it into a full presentation set.
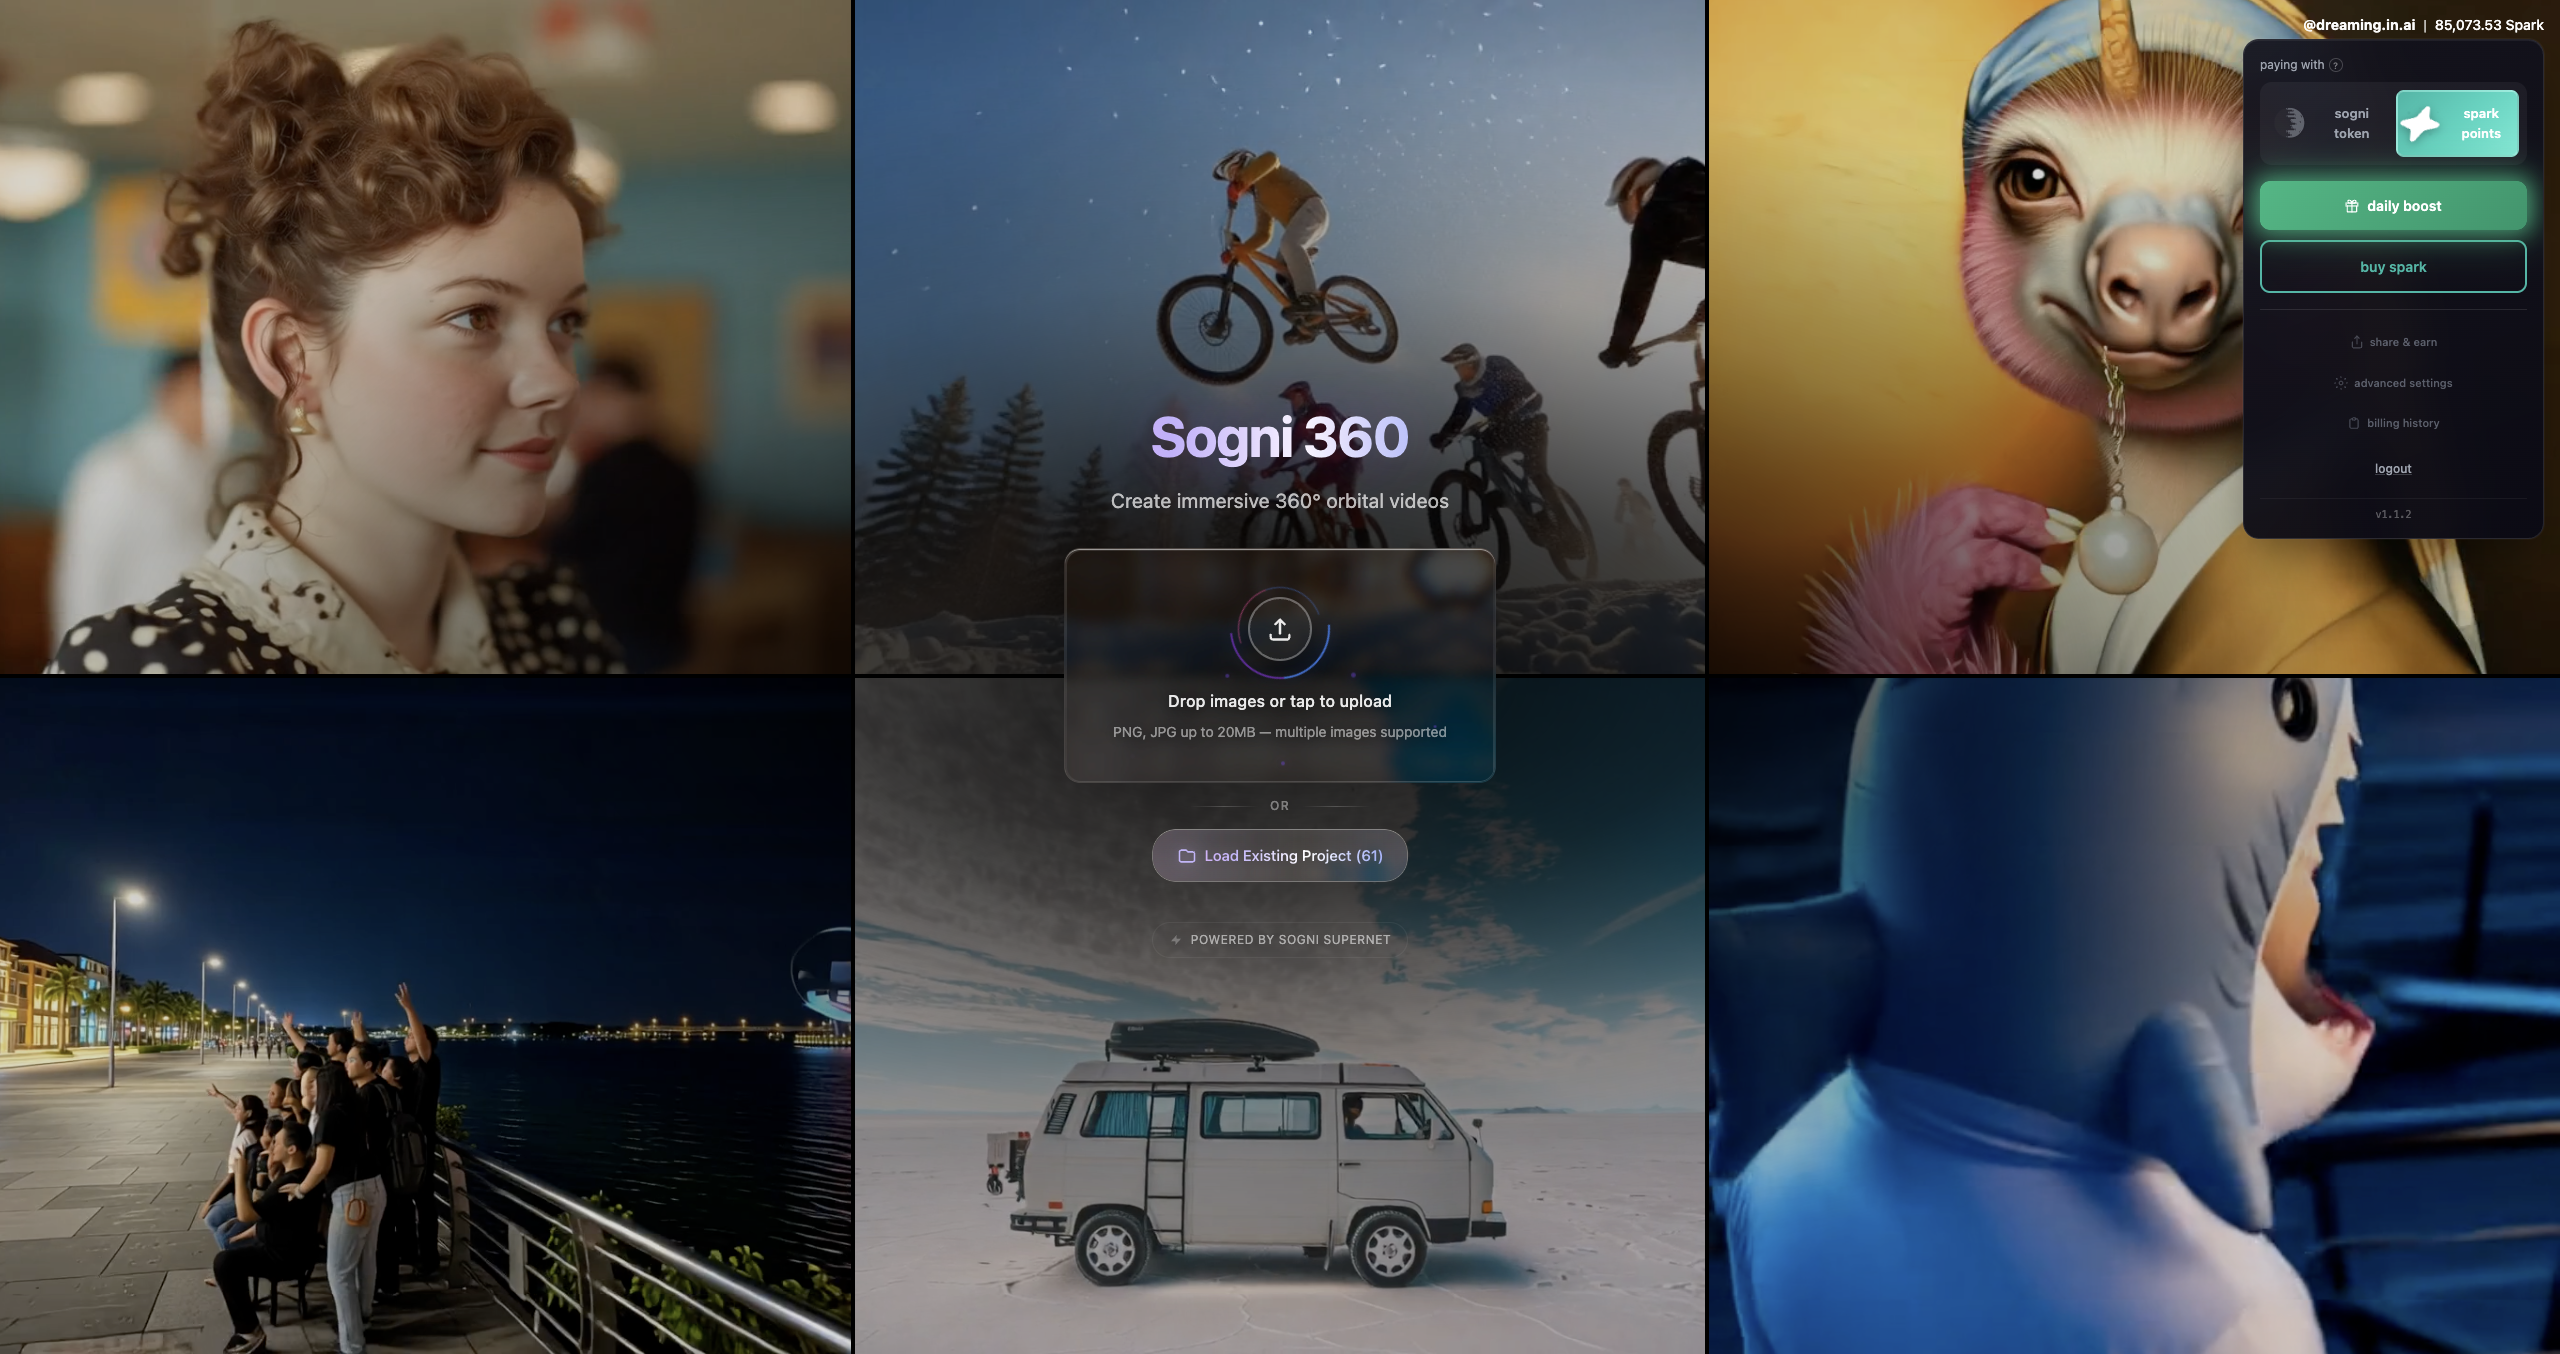
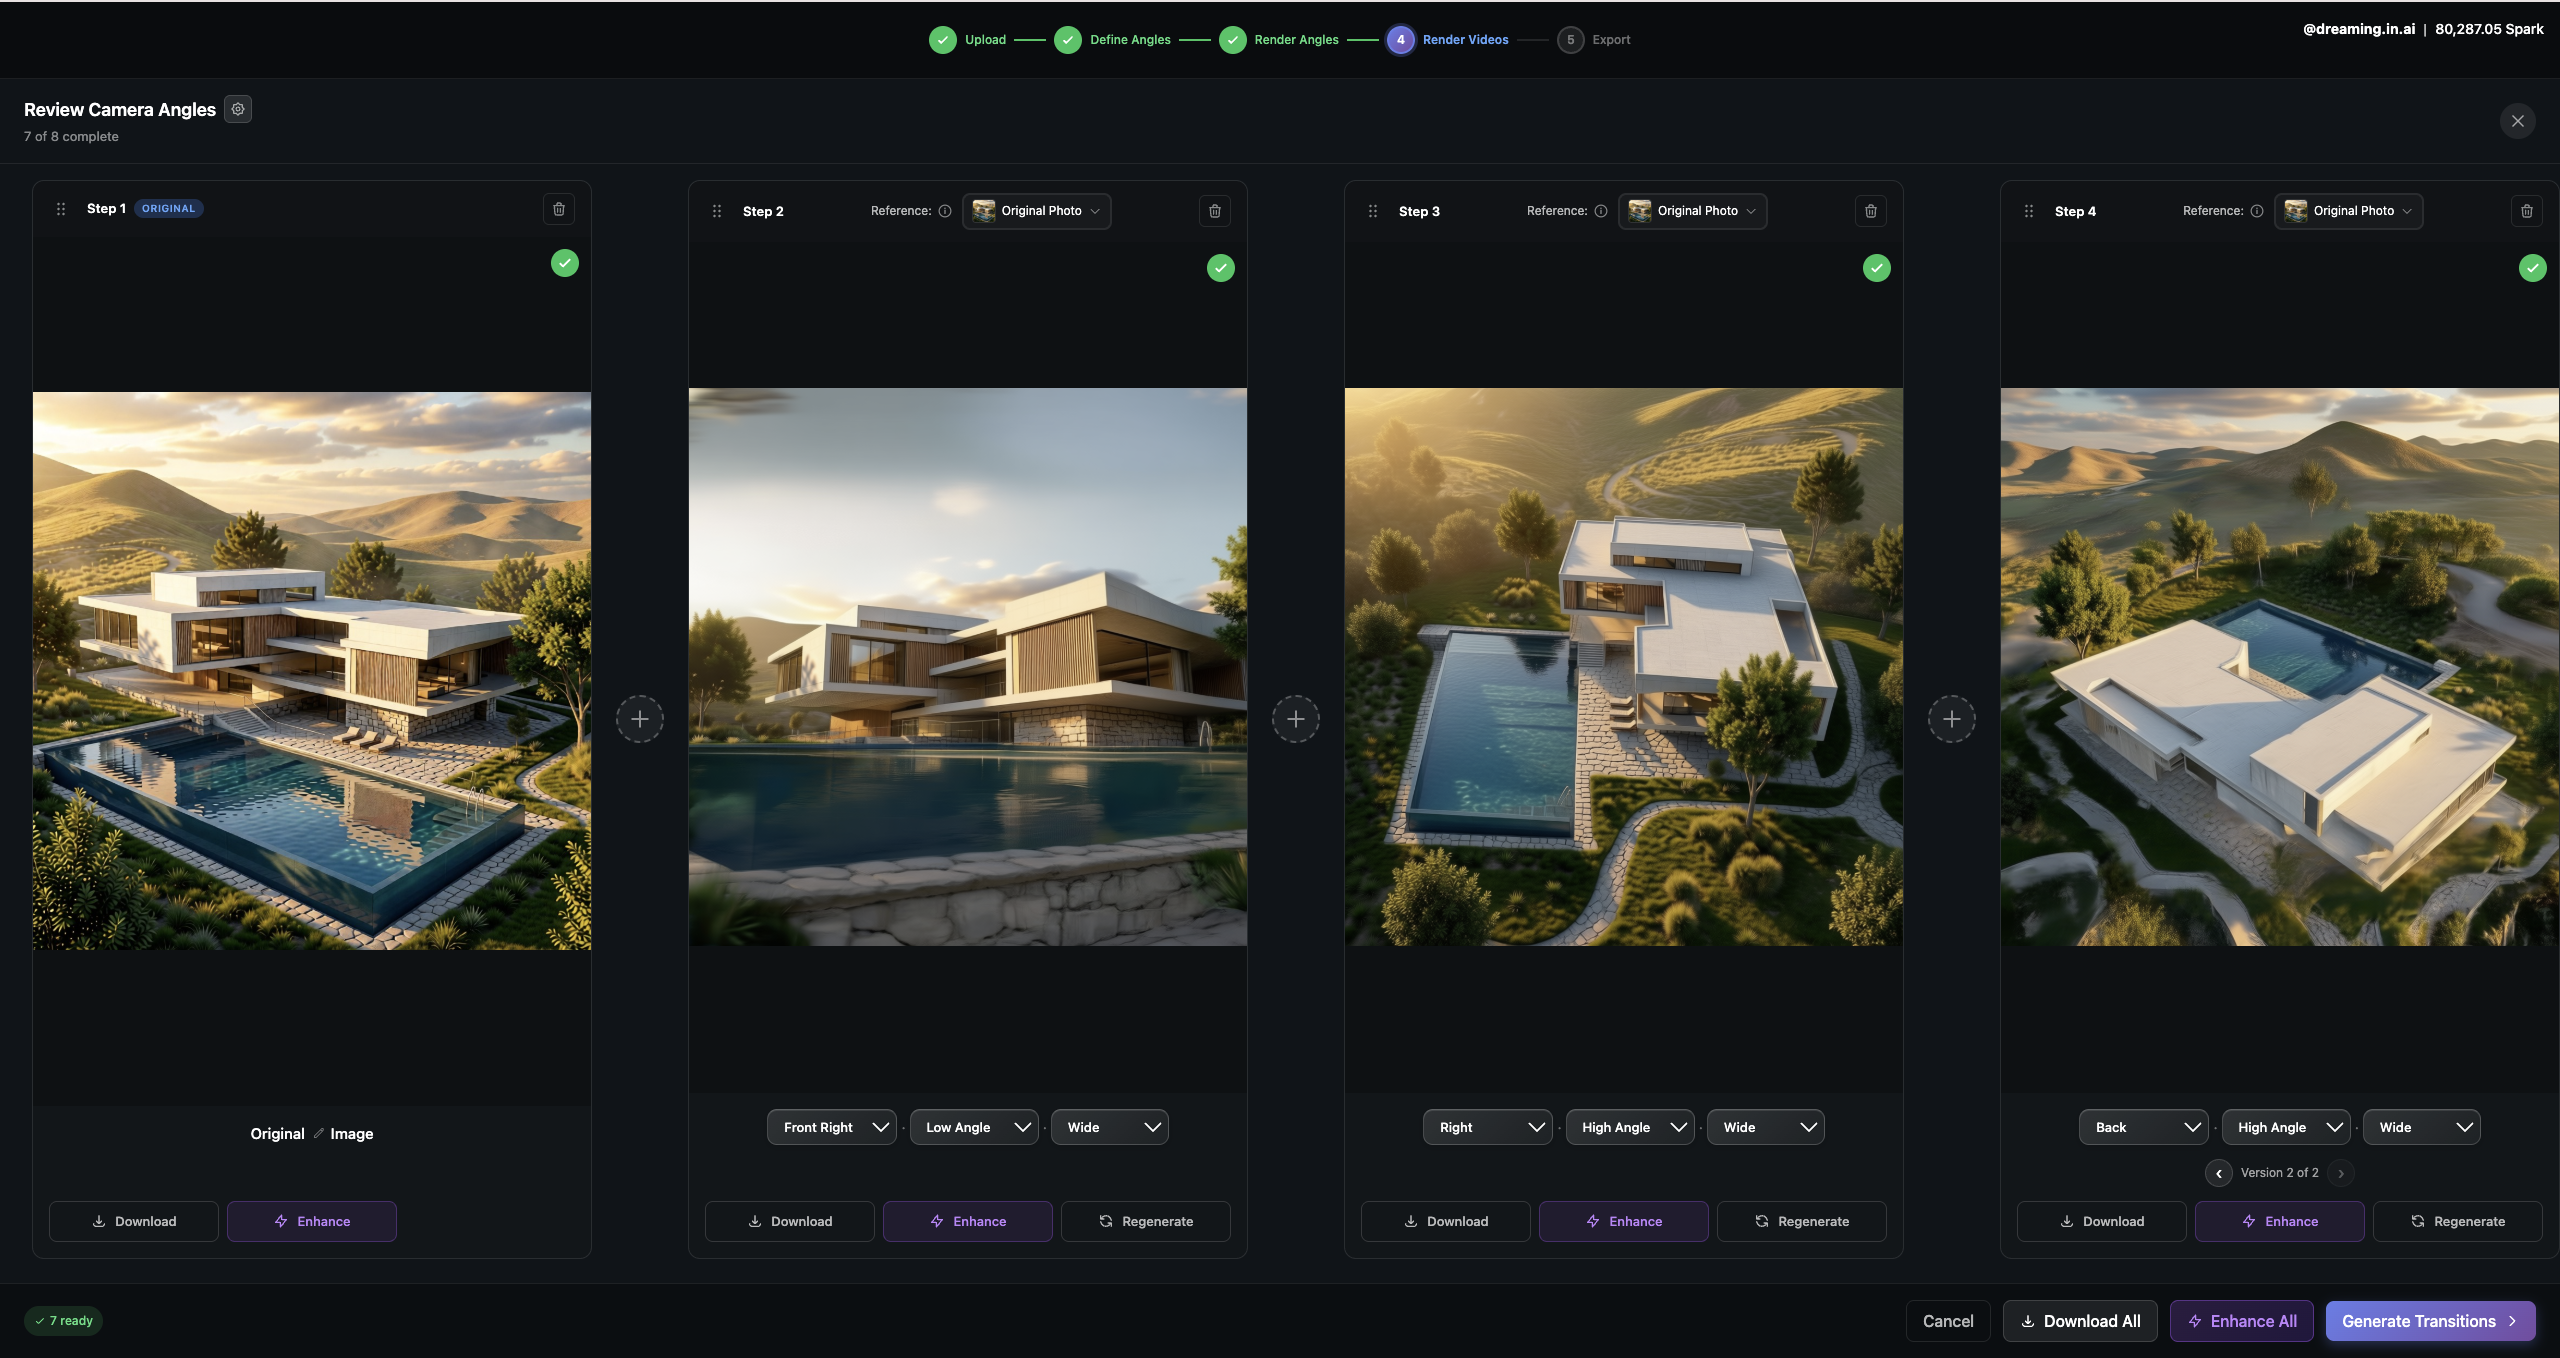
Open 360 by Sogni and generate your first angle set.
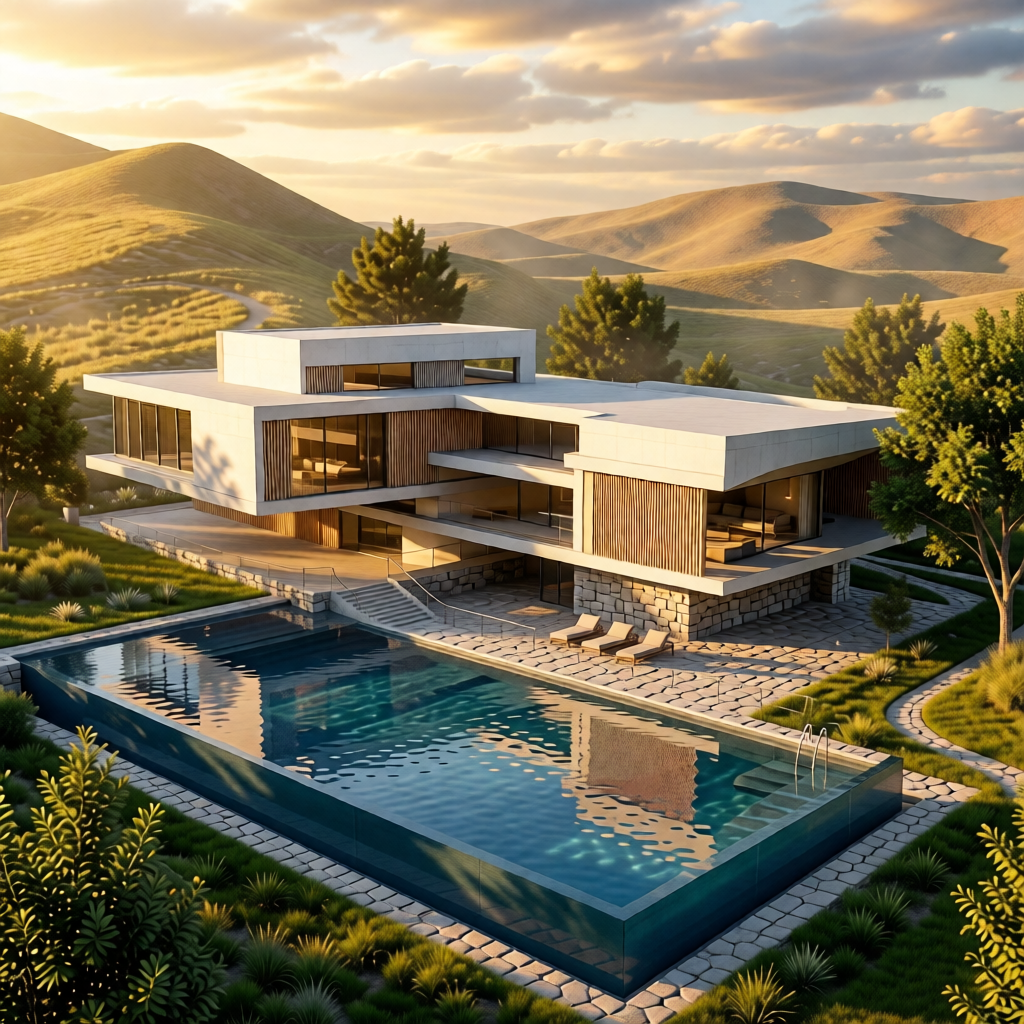
Take your best enhanced still into 360 by Sogni and use it to generate a full angle set from one image.
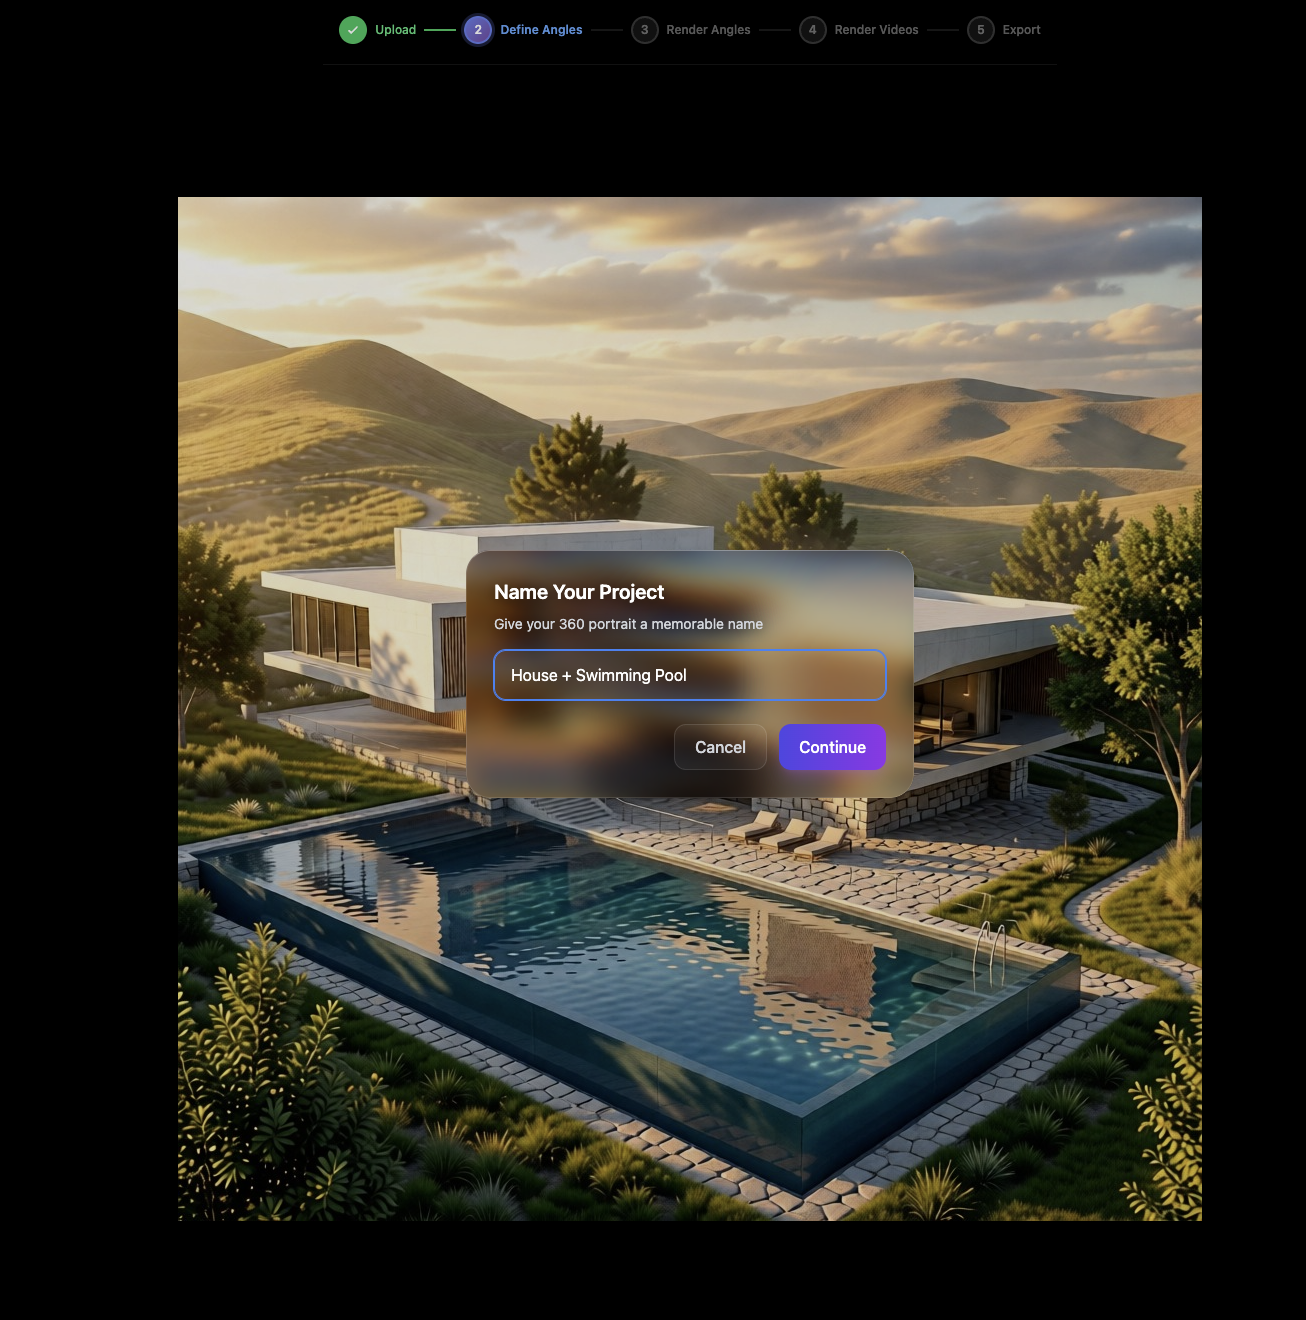
1. Set the image size, name the project, and save it so you can return to it later without rebuilding the setup.
2. Choose a preset camera path. For a first pass, use 360 Spin High+Wide (9). You can define your own camera path once the base angle set is working.
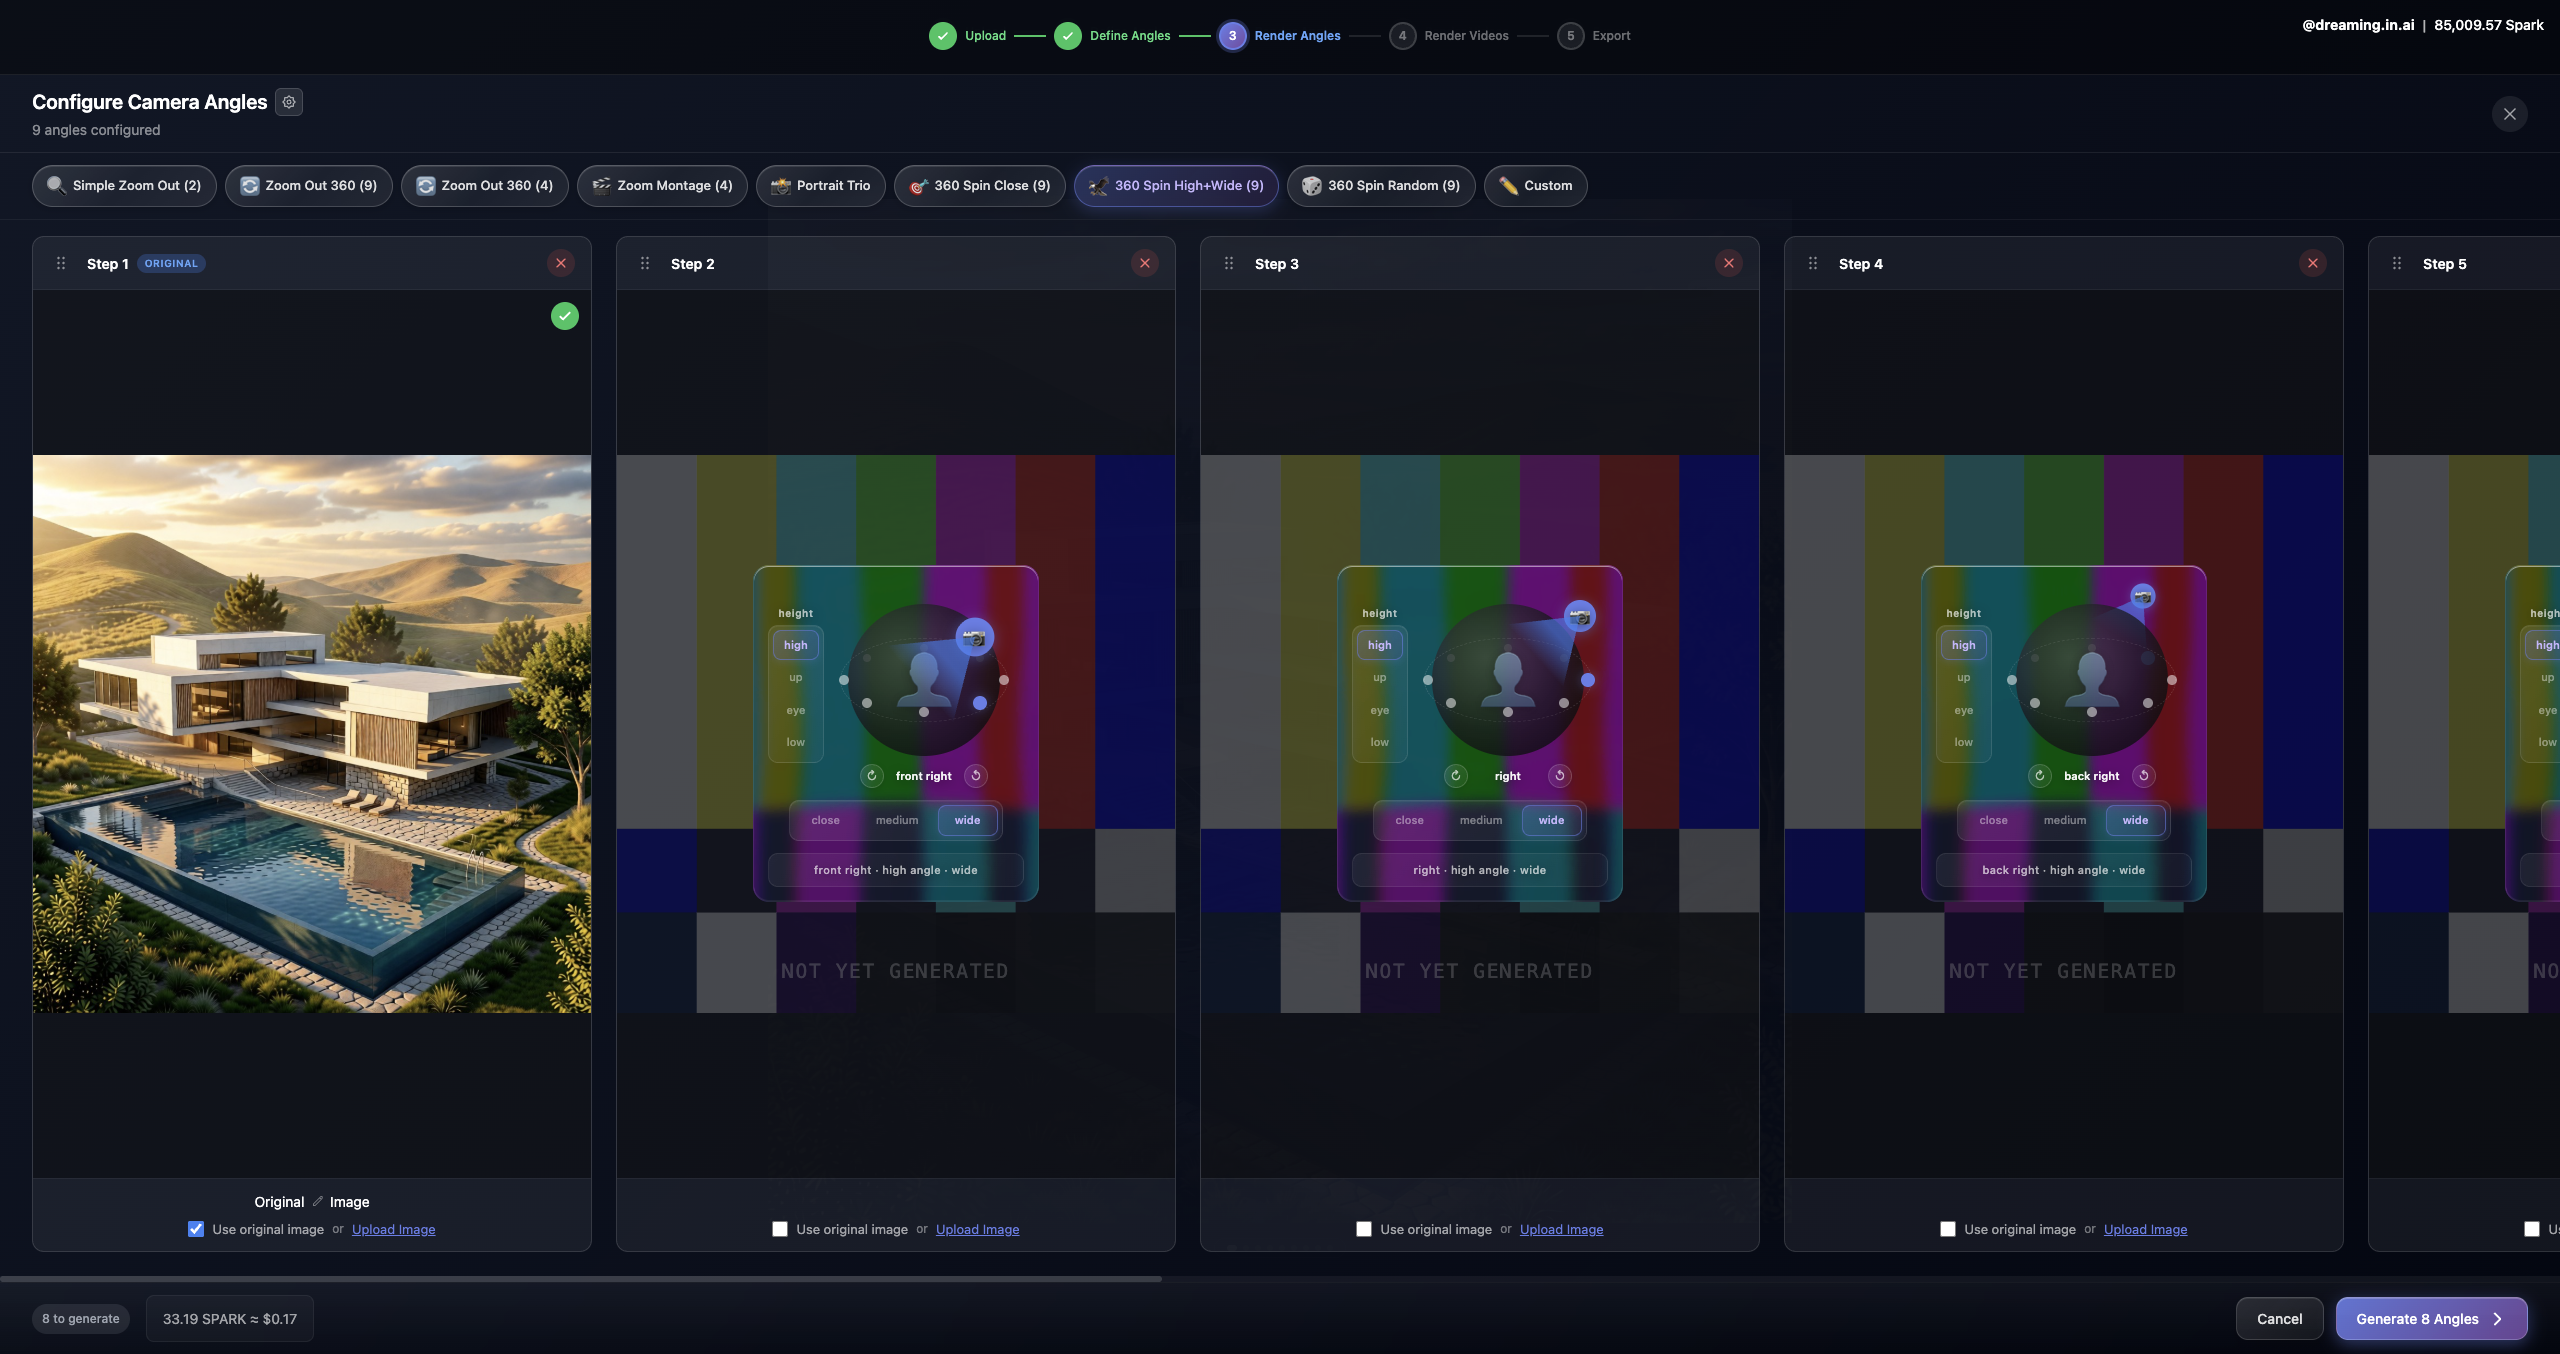
3. Click Generate 8 Angles. In about a minute, one polished still becomes a presentation-ready set of viewpoints.
Build a polished still-image set.
At this point, you already have something valuable: polished stills that can become a catalog, a presentation insert, a client-facing concept sheet, or the visual foundation for a more cinematic piece.
You can stop here and deliver a strong still-image package. Continue below only if you want to turn the angle set into motion.
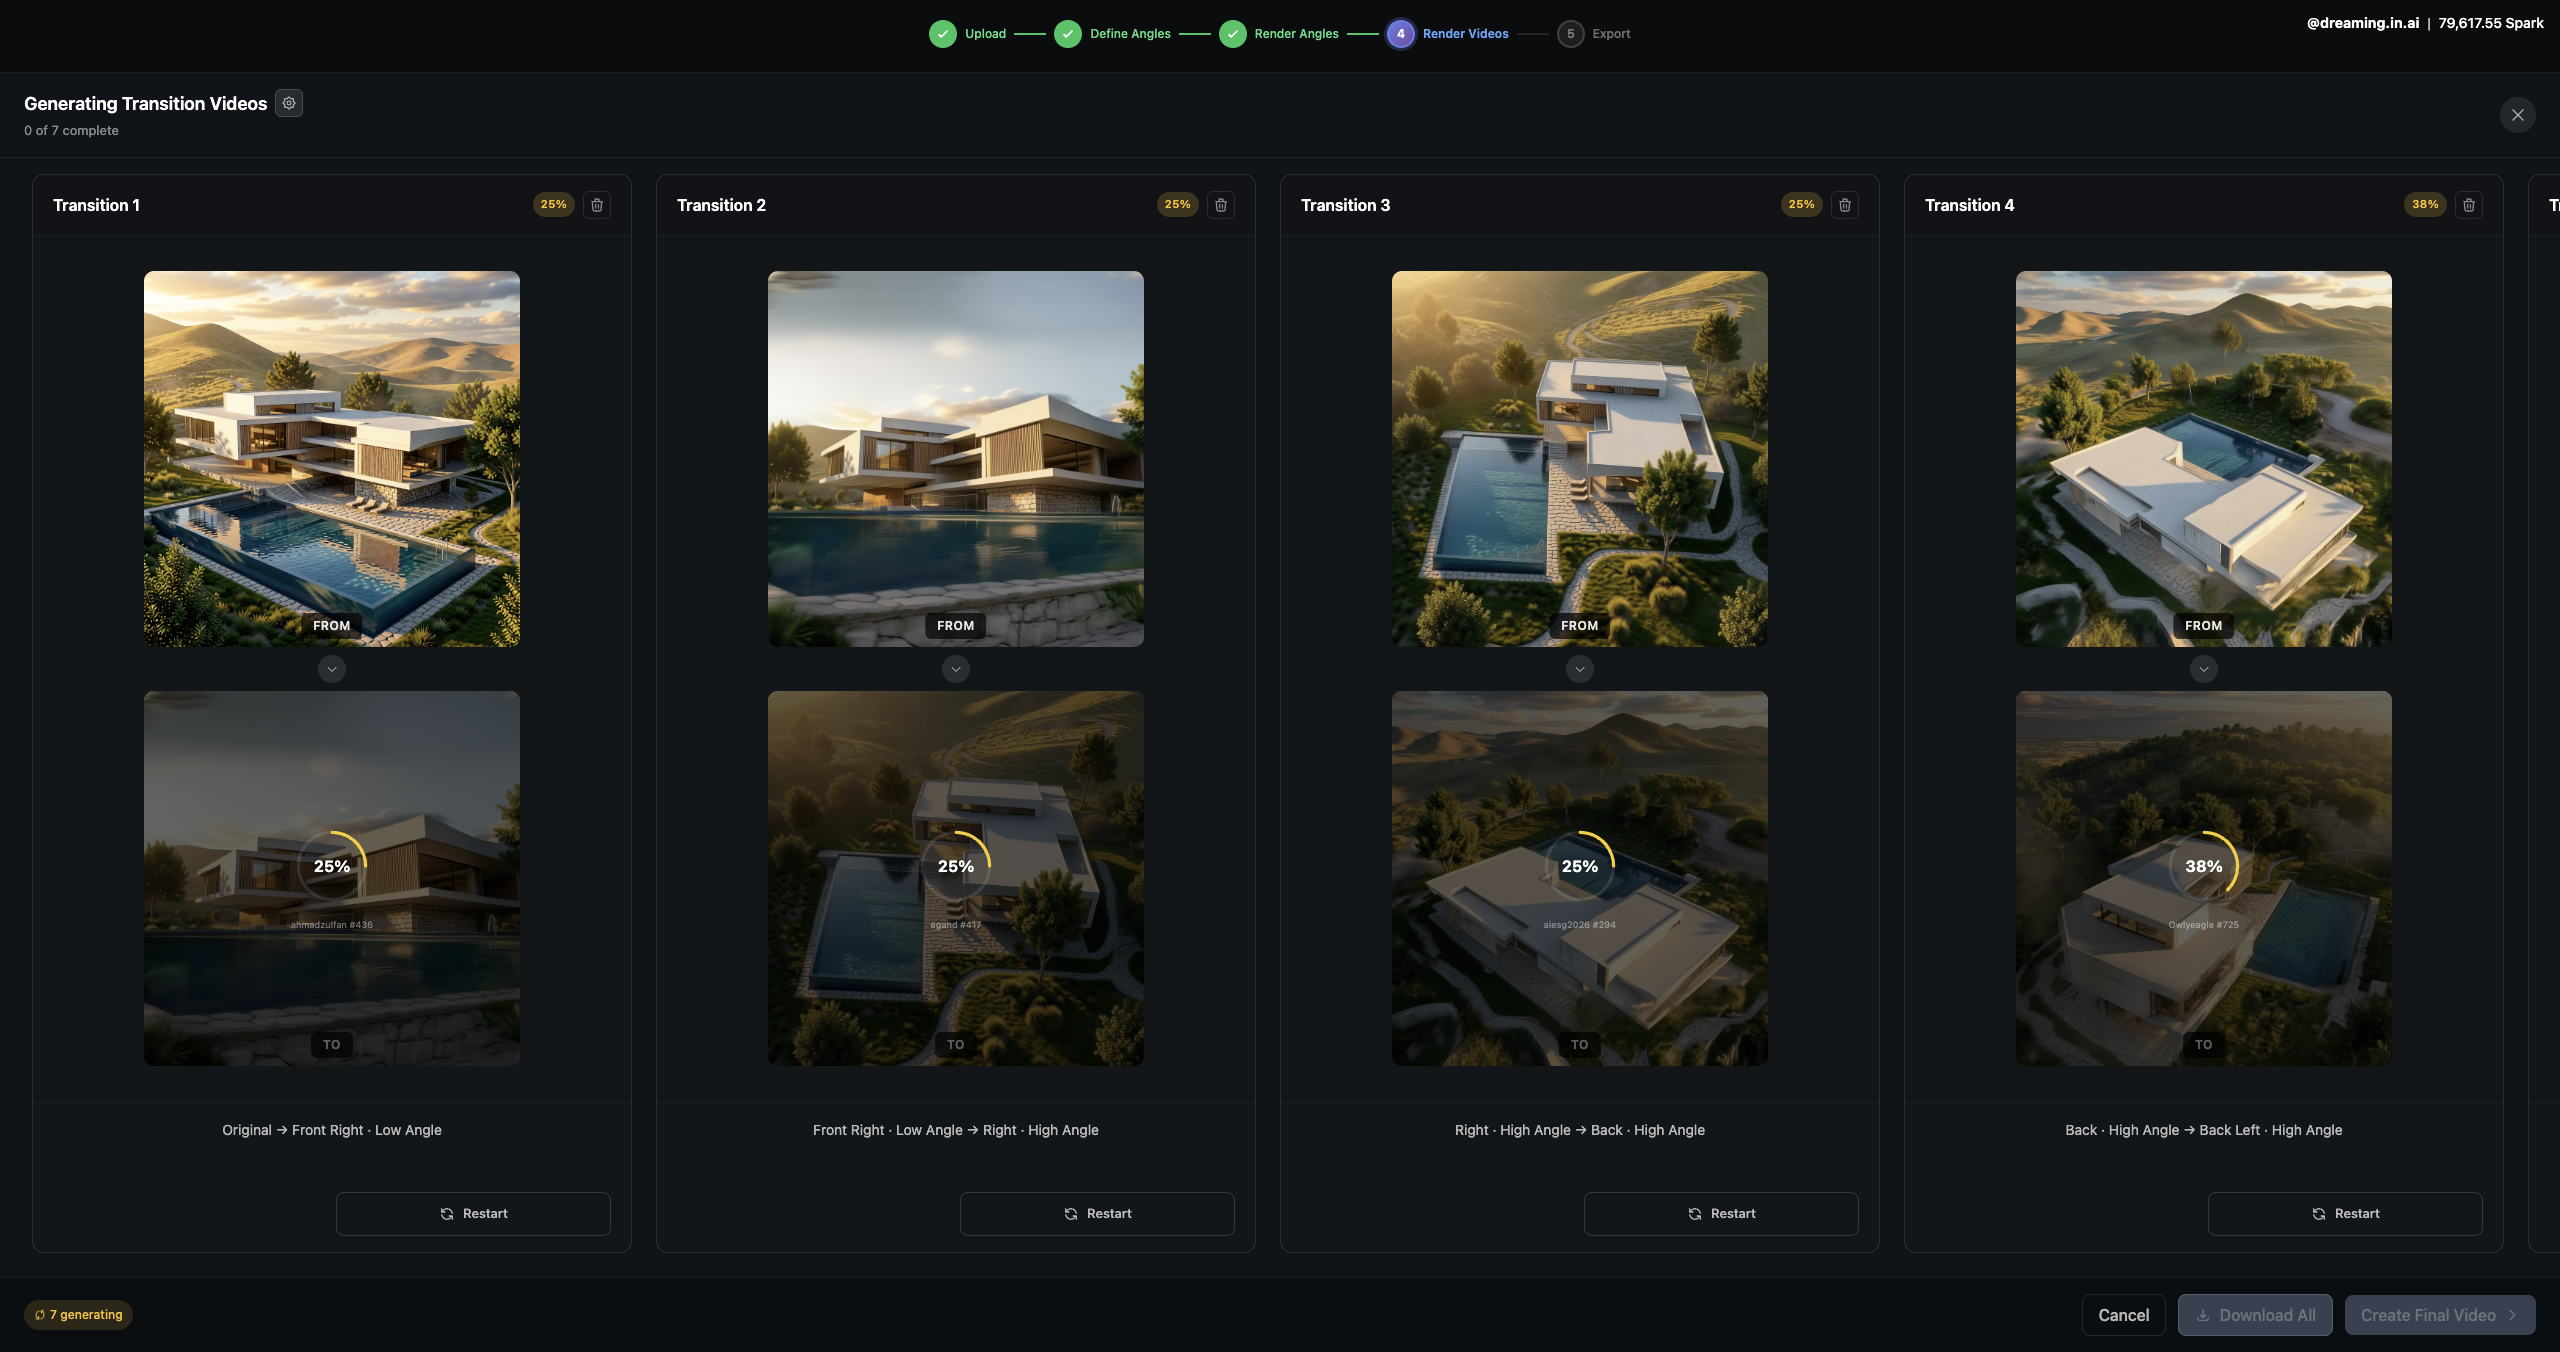
Generate transitions and define how the visual story should move.
Recommended first pass: Use the default transition settings, choose one video model, and render a short draft before customizing prompts, audio, or higher-quality settings.
Once the base motion works, you can customize transition prompts, choose the video model, set duration and resolution, and add audio if needed.
- Pick the transition type or write a custom prompt.
- Choose the video model: LTX or Wan.
- Set the duration, quality, and resolution.
- Upload your own audio or generate music with Sogni Super Apps.
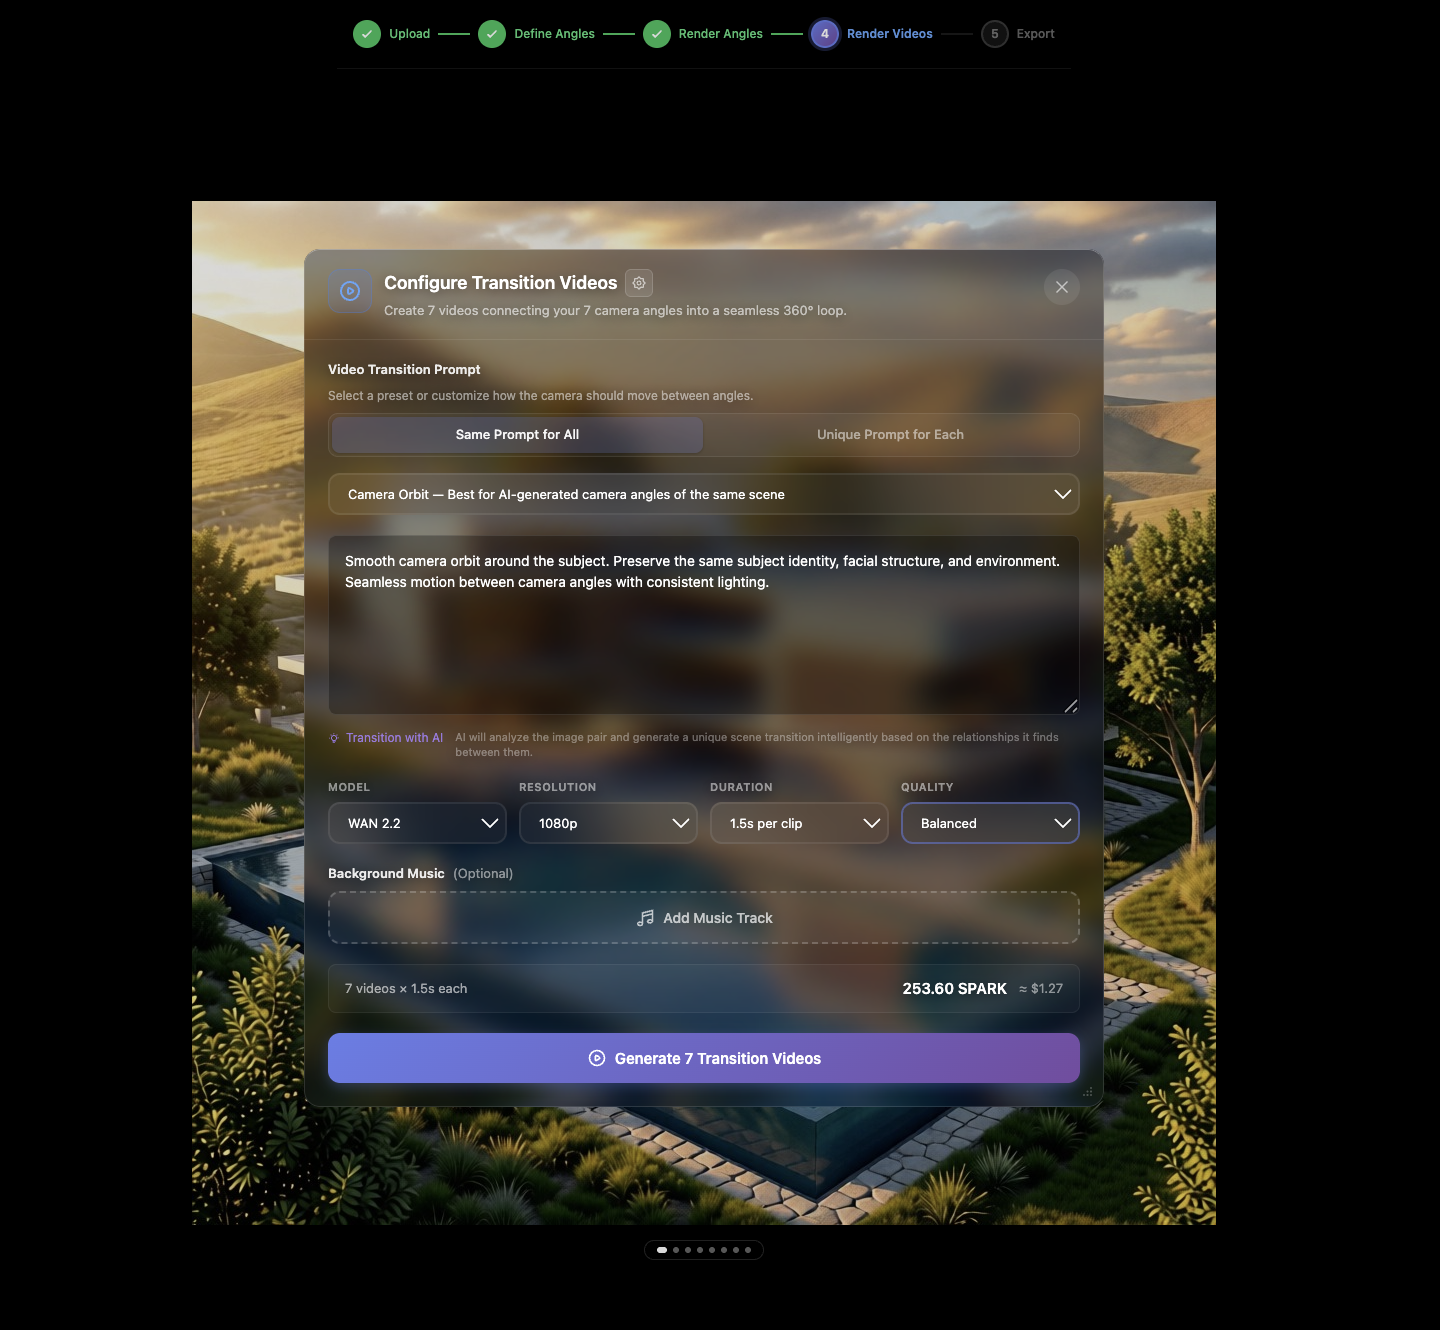
Your transitions will be ready quickly. The generation time depends on quality and clip length, but the system shows real-time progress as everything is created.
Fine-tune the pacing, then render.
You can make the motion slower or faster depending on the feel you want. Select the shots you like, remove the rest or regenerate them, and then stitch everything into one cohesive film that is ready to publish.
Because the project stays editable, you can return, replace shots, and regenerate the final video without restarting the workflow. That keeps the creative loop in your hands from the first still to the finished motion piece.
Turn the sketch into a cinematic reveal.
Recommended first pass: Use your original sketch as the Start Frame and your best enhanced still as the End Frame. Render a short clip first so you can judge the transformation before adding extra polish.
Choose LTX or Wan in image-to-video mode and describe how you want the reveal to unfold. Once the motion feels right, refine duration, quality, and music to match the presentation.

It only takes a simple prompt to turn a static concept into a reveal that feels premium, cinematic, and memorable.